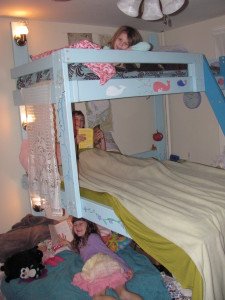
Ever since our move ashore, the care and upkeep of Ganymede has been necessarily pushed to the back burner. It was just one year ago that we moved off of her into the rental apartment we now call home, and though we have by no means neglected our dear little boat, there’s been a lot of other things to use up our spare time. Since we didn’t own a stick of furniture when we moved in, much of this year was spent building bunk beds and shelves and desks and picture frames. Now Apple Blossom Cottage is pretty well furnished—everything has a place to go, and there’s just one or two more small things on my radar to build.

With all that, we did spend a good deal of time last winter painting Ganymede’s locker lids and other removable parts in the basement, and in the spring did the gargantuan task of painting the deckheads and varnishing the cabin ceiling. After that things slowed down as we chose to spend what little time we could devote to Ganymede in sailing her. We even took a two-night cruise over to Prudence Island when I got three days off during a propitious series of tide cycles.

I’m happy to say, though, that in spite of all the distractions, I’ve been able to cross off SOME of the things on my list. The first was my pie-plate-skylight trim ring (say THAT five times fast!). The one I’d made of oak while working on the Coronet restoration was cracking horribly, and pretty weather-blackened. I had always meant to make one out of fiberglass, and finally a few weeks ago I did.

The first step was to borrow another pie plate from my longsuffering wife and attach it to a piece of melamine-faced board with hot glue. Four rings of fiberglass fabric went on next—three of 1708 (for the composite geeks reading this) and one of 10-oz boat cloth. Once the resin cured and the piece was de-molded, it was child’s play to trim it with a jigsaw, sand the edges round, and slosh some 545 primer on it. Fits like a glove, and looks far better than the clunky oak one it replaced. It will look even better when I re-fair and paint the hatch it sits on….but that’s for another day.

Another experiment had been the mainsheet. Until now we’ve used two mainsheets, attached at opposite sides of the cockpit, which eliminates the need for a traveller and gives excellent control over the position of the boom. Furthermore, two people working together can get the boom sheeted in easily in the hardest winds by tallying onto a tackle apiece. It has worked splendidly in all the conditions that Ganymede encountered in five years of voyaging.

But the system has it’s downsides. First, there’s two tackle falls to get all tangled up among the jibsheets and running backstay falls. Second, the weather sheet, which is kept slack, tends to distract the helmsman, especially when it’s Danielle. Then, when sailing with guests aboard, you have to have not one but two of them move to access the sheet cleats, which they are inevitably sitting on.

So using some spare blocks and a very long piece of nylon rope left over from my old rockclimbing days, we experimented with a single mainsheet, rove from one side and back several times by way of the boom. To my surprise it worked superbly on the one test-sail we’ve been on, well enough that I’ll probably spring for twenty fathoms of proper mainsheet line and a triple block for the boom end next time I find that a couple hundred dollars are disturbing my rest by crying out to be spent.

Lastly, one of the things I’ve been thinking hard about for a long time is a set of proper gaff jaws. It took ages to get my gaff saddle engineered so it would work properly, and it still manages to capsize from time to time, especially when I need to get the sail down in an hurry. So I made a form out of a paint can (which is what I used as a mold for the saddle), some scrap lumber, Bondo, hot glue, and tape, and laid up a set of jaws on it.

After a quick run out to the boat to test for fit, I’m now adding layers of carbon fiber here and there to ensure sufficient strength against the huge twisting force exerted by the gaff under full sail. No doubt it will take several tries to get it just right, and the test model will get hacked beyond recognition before serving as a prototype for the proper one I’ll make later, but that seems to be the story of my boatbuilding life. The important thing is to keep on tweaking, keep improving, keep inventing, and most of all, keep on sailing.
