Here are directions for an eye splice in covered rope with a Dyneema, Vectran, Technora, or Kevlar core that provide for the cover to go around the eye and thus protect the core. While many simply do a “flap out” splice, this is inelegant and unnecessary, since the flap-in splice has been known for several decades now. It is details like this that mark the difference between work that’s lazy or incompetent and work that’s worthy of the rope being used.
The rope used here is 7/16″ Yale Ultrex Plus: a Spectra core with braided polyester cover. More than any other manufacturer, Yale makes rope that’s dreamy to splice.
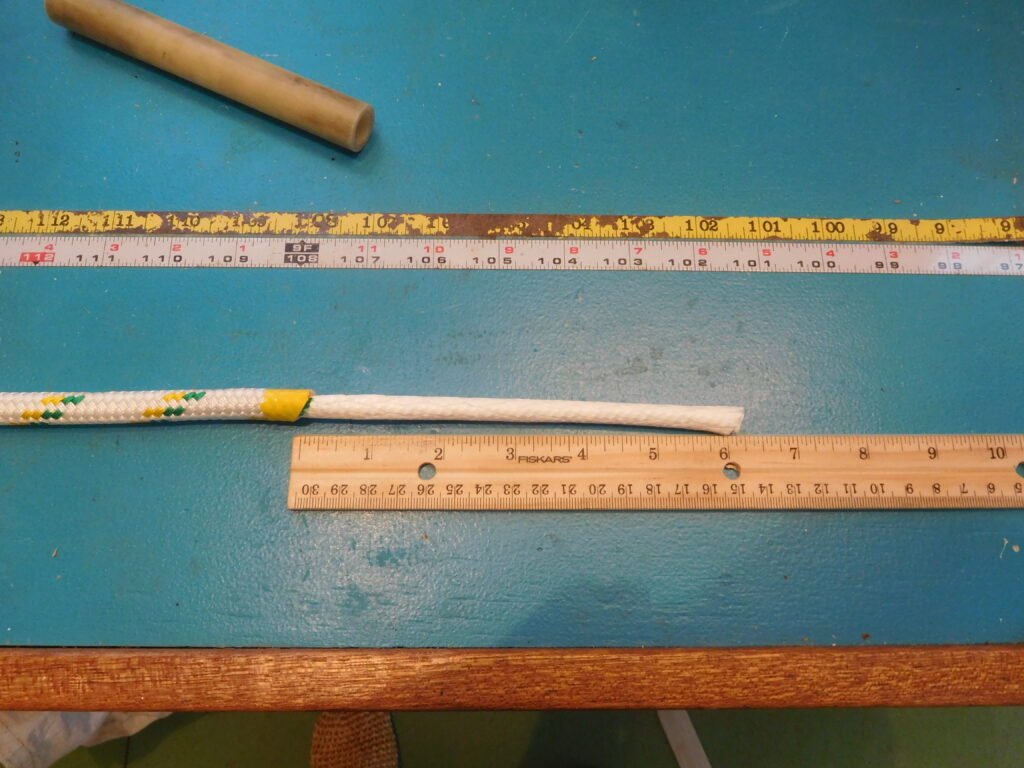
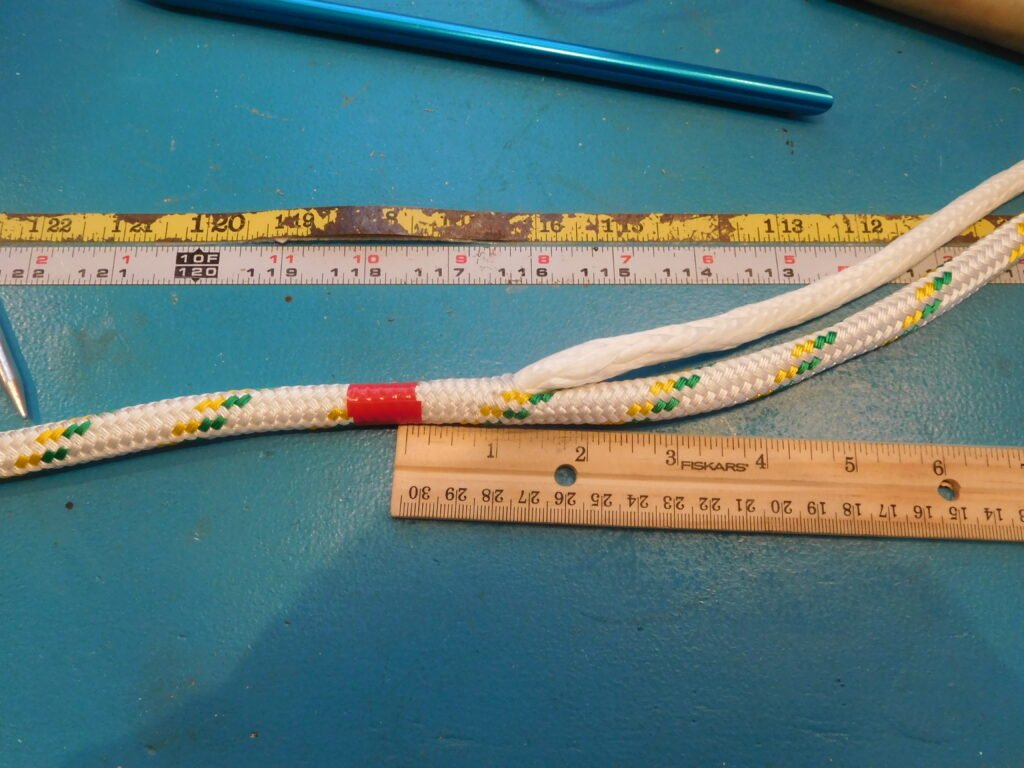
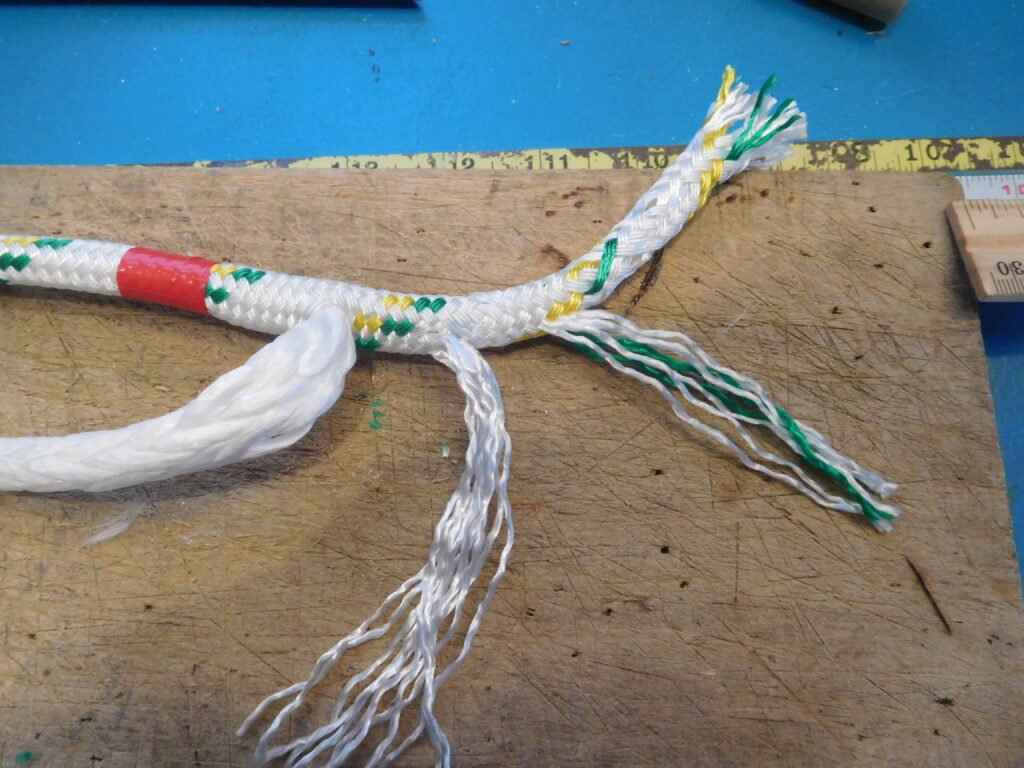
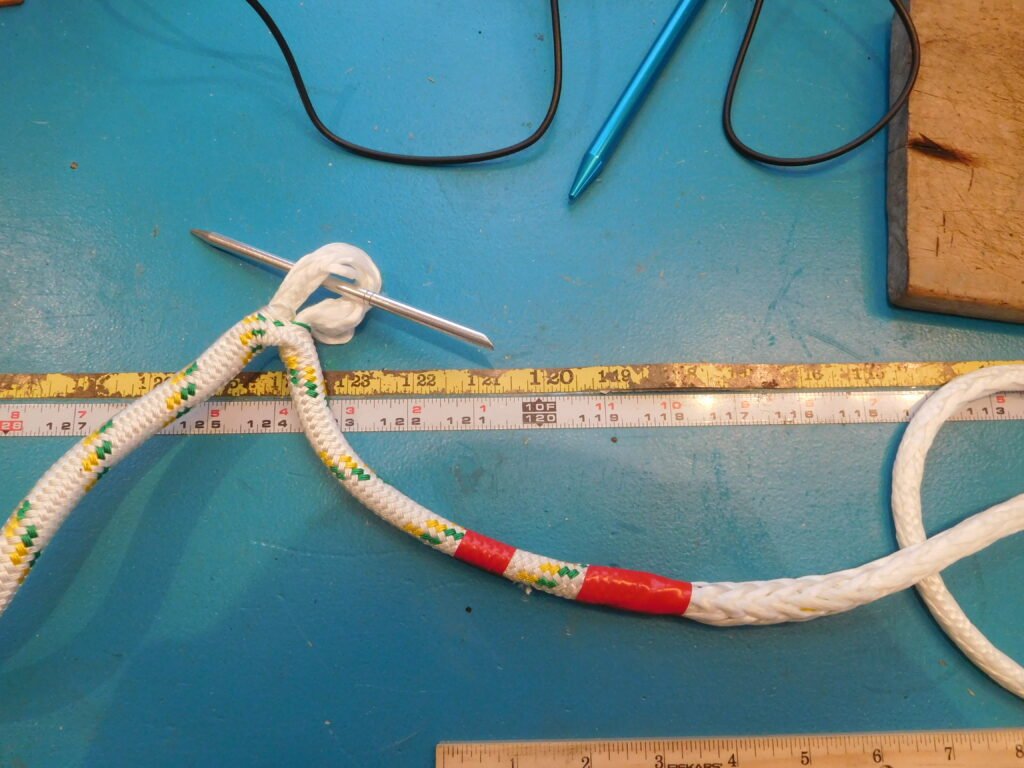
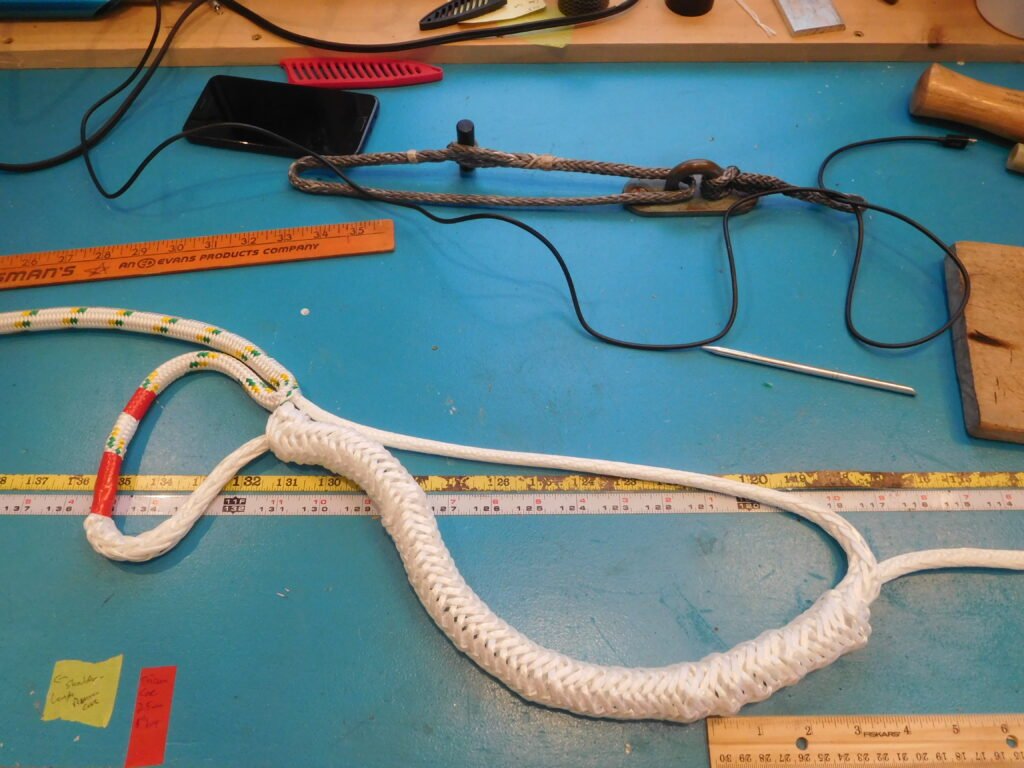
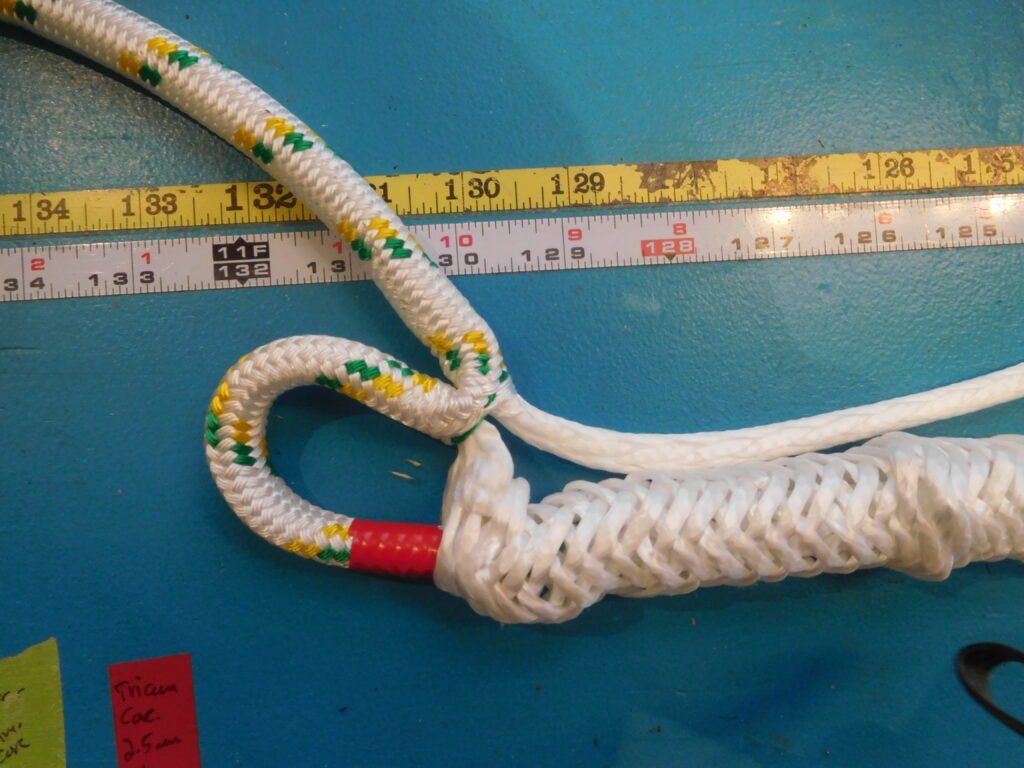
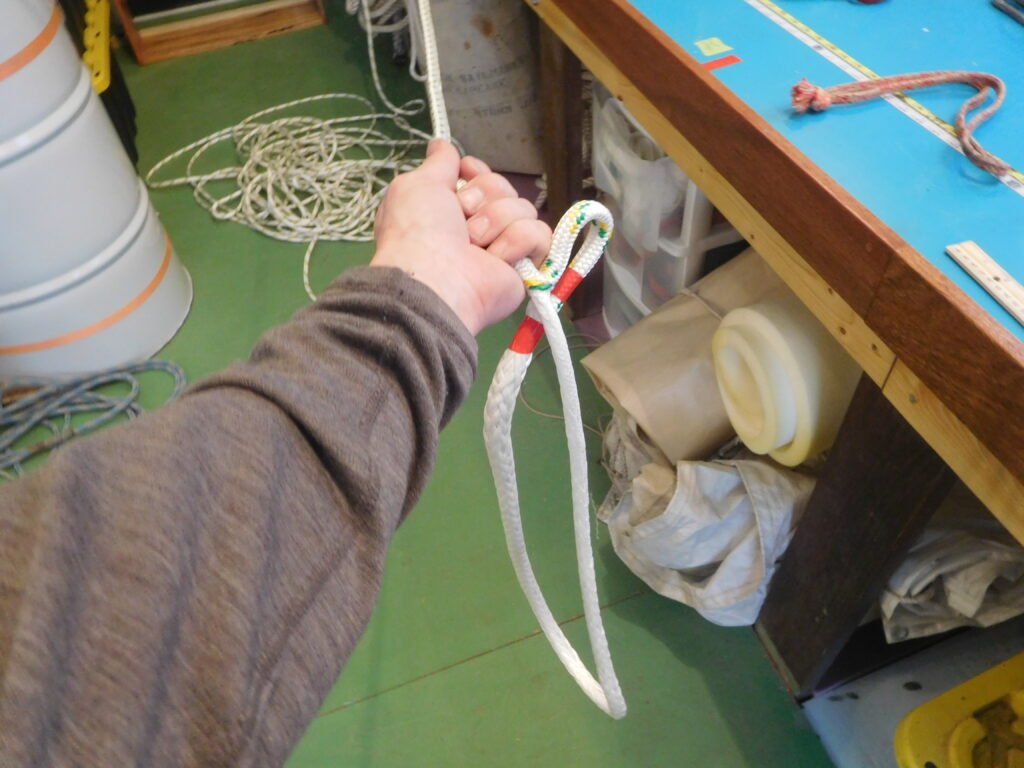
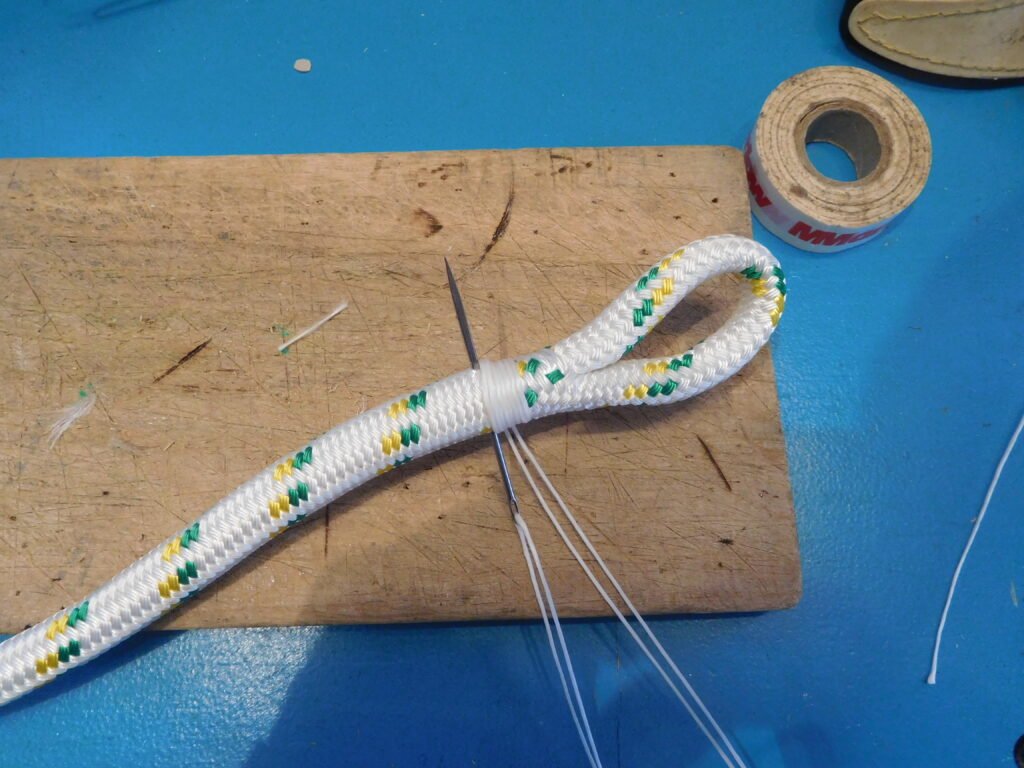
A piece of Yale Ultrex Plus: Spectra core with a polyester cover.Start by measuring off two or three fathoms from the end to be splicedTie a knot with a pin in it so you can get it undone later. The pin can be a fid or piece of dowel; I make tapered hardwood fids to use for this.Slide the cover back six inches or so. This is called “cheat” and is crucial to getting the cover back over the splice later, when it’s fatter.Milk the cover slack (the cheat) back toward the knot, so there’s no slack in the part of the rope you’re working on. The knot will prevent it going too far.Measure three fid lengths from the end.At the end of the third fid-length, dig a fine fid (I like the 1/4″) into the cover as your core extraction point.Separate the cover strands and dig out the core, making sure not to get between the picks of any strand, but to get between whole cover strands.Pull the core out of the cover and gaze at it in satisfaction. The extracted core should be three fid lengths long.Wrap some tape tightly about an inch back from the extraction point. This will mark the place where the eye buries back in.Cut off the cover tail leaving a four-ish inch flap.Taper the flap a little.I said a little!Cut off the taper strands.Pull the tapered flap into the bury using a wire fid.Snug up the crossover……and cut the tail at an angle.Milk the core back over the tapered flap.Tape the crossover tightly so it doesn’t fall out.Form the desired eye. Here it’s two inches.Stab the small fid into it…and extract a loop of core, just like was done before.Pull out a big fat loop of core, pushing the cover back toward the pinned knot. If you didn’t give yourself enough slack before the knot, you’ll know it now.Tape the 7/16″ fid tightly to the end of the bury tail.Insert the fid into the loop of core we just talked about.Bring it out again a good way along. Make sure no core strands were caught, but that the fid travelled up the exact center of the core.If you went too far, no big deal. If you didn’t go far enough, no big deal–you can always re-bury some more.Remember the tape on the crossover you put on less than two minutes ago?Take it off, and pull the core up to the tape eyemark. Some people stitch or whip the crossover where the tape was, but that’s unnecessary and can cause annoying bunch-up later. Better let everything adjust naturally.Milk the cover tight over the eye, and the core over the bury tail, until you like where the eye winds up.Tape that crossover so it doesn’t jigget around for now.Halfway along the bury, extract three strands.You can do the taper differently, if you like.but I do 3,3,and 3.Chop the last bundle of three into its own taper.Milk the core back over the bury tail.It’s good to milk it hard several times so it doesn’t bunch later.With more curmudgeonly cores, you can use a milking strop to reduce the volume. It helps a lot. Just hitch it on and slide it down hard along the splice several times.Put the pinned loop though a toggled strop on your bollard or strong point. Don’t even try to splice without a solid strong point to pull against. Every bench needs some sort of anchor point.Pull tight on the core while you milk the cover back over.As you milk, you can bend the rope back and forth at the stiff spot to soften it up.Sometimes by this stage you’re beating on the cover with a hammer to help it stretch over the splice. I rarely splice anything without hammering at least a little.With perseverance, you’ll eventually find yourself here.Remove the crossover tape before it goes into the splice. Tape inside splices is considered gauche.Keep milking the cover over the splice. Hammer on it if you have to!Almost there! Gotta take off the eyemark tape before it gets pinched in the splice.A couple more hard milks oughtta do it. Sometimes it’s at this stage that you have to pull the splice with a winch or come-along: usually on smaller diameters with tight covers.Now you have an eye with a baggy cover. At least there was enough cheat.Milk the eye-cover slack back out: baggy eyes are bad form.And now your eye is the right size. The extra cheat can be milked off the back end of the rope, or just spread along the length: it depends on usage. Older ropes get a lot of cover stretch that usually milks itself off the back anyway.Clap a whipping on the splice throat.Make it tidy! Whippings draw the eye, and you don’t want to look like a chump after all this work.There’s a million ways to do whippings, but it’s standard for it to be no longer than the rope is wide. Beyond that, it looks like you’re hiding something. It’s good to have various thicknesses of whipping twine on hand for different diameters of rope, since too many wraps of thin stuff looks as bad as too few of thick.Almost done! Go to the back end of the rope.Slide the cover back a foot or so and cut the core.Using the pull fid, bury the empty core into itself.You don’t need too much bury for just a reeving eye.Reeving eye formed. Every line that gets moused out should have one of these: it’s the standard end treatment in a rigging shop.Cut off the excess cover.Clap a whipping on it. Some people do just a couple of stitches. Make sure whatever you do, it’s enough not to cut loose on you at the masthead sheave or a halyard exit, where you sometimes have to tug it pretty firmly.