This is another version of the covered selvagee loop, except that in this case there’s an eye at each end, while all the strands pass though a common middle section. This is fairly wizard-level loopmaking and shouldn’t be tried until the regular covered loop is mastered. You need to have a good feel for the easy loop before troubleshooting the advanced one.
A plain eye-to-eye strop. There are infinite variations of this possible.A toggled soft shackle made with an eye-to-eye loop as described here.
This eye-to-eye is the basis of toggled strops like in the above picture: a toggle spliced in to one end, and a loop for the toggle at the other. These are quickly replacing the heavy, expensive, corrosion-prone stainless steel shackles on spinnaker and other halyards of high-end boats.
Depending on use, the eyes can be made of any dimension, while the body of the strop behaves exactly like a piece of rope, and will go over sheaves and through fairleads easily.
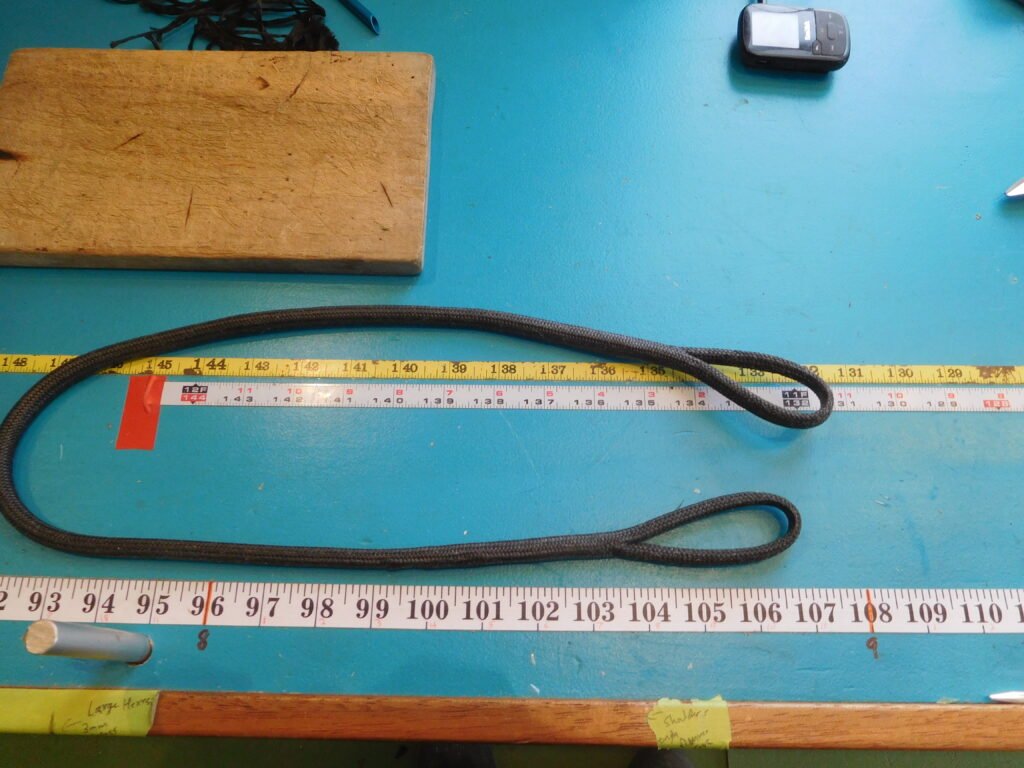
It starts by measuring out a loop with as many passes as desired, exactly like you do for regular covered loops.
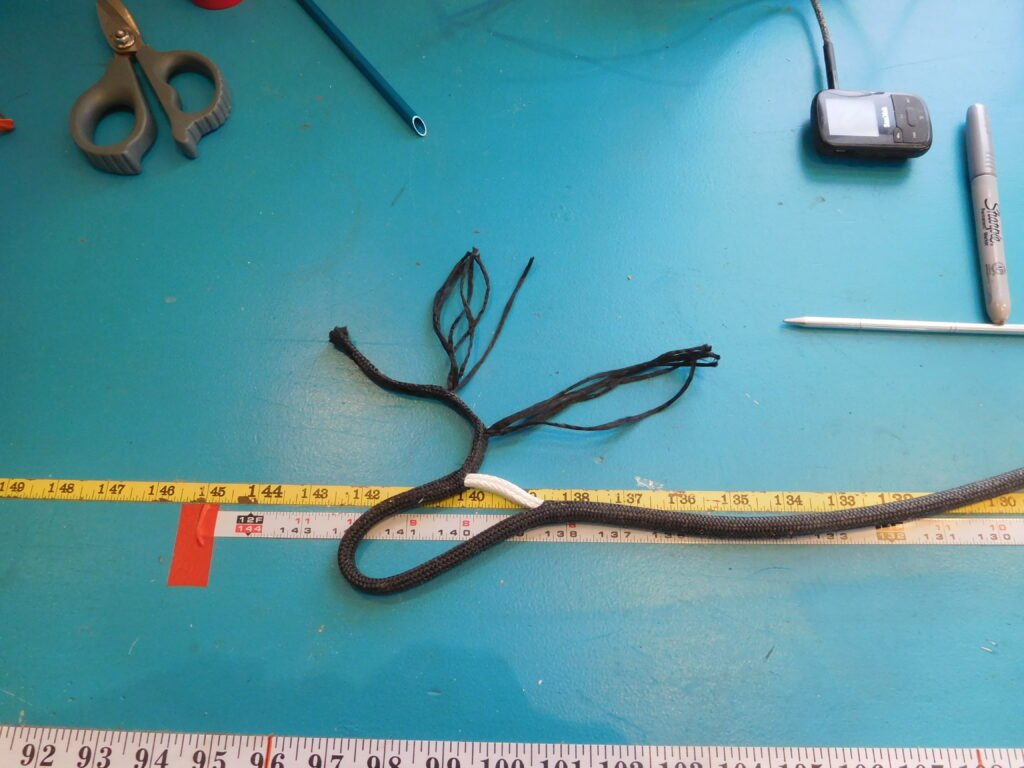
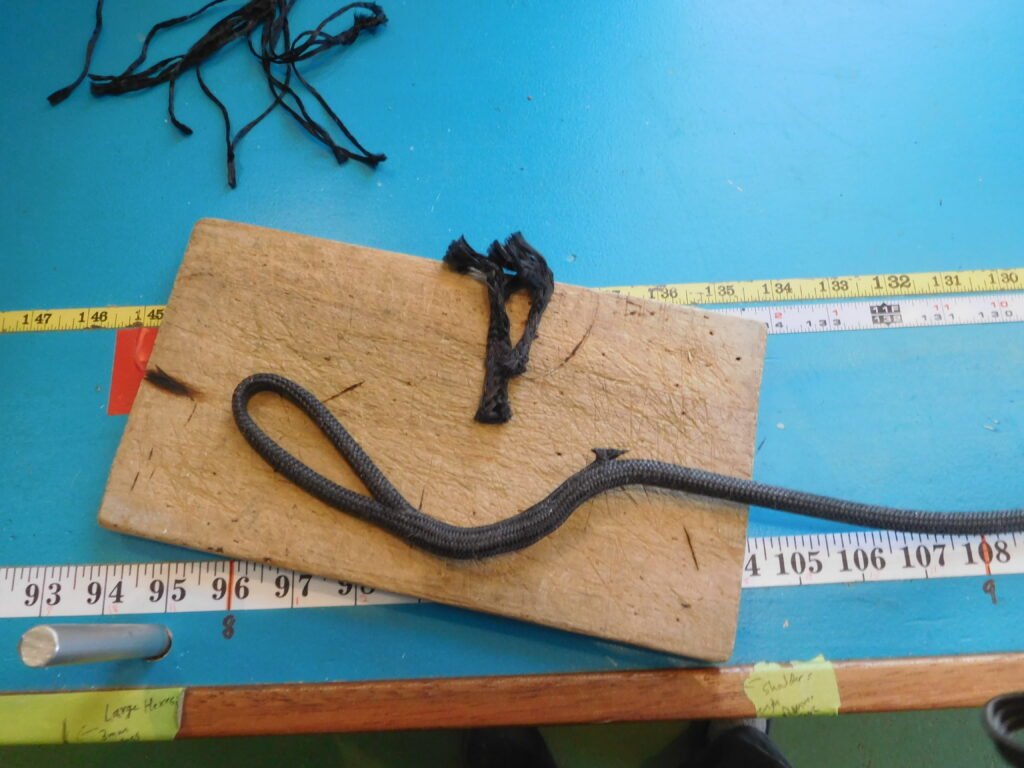
Start by marking the bury with a Sharpie.It takes time and maybe some tries before you figure out how long to lay out the strop to achieve a desired finished length. It depends on splice bury shrinkage for that core diameter, number of passes, how hard you pull it during layout. Usually if you lay it out to the exact target length, you can see how much it grows or shrinks when pulled on, and adjust the next one. It’s rare to hit exact numbers first go.To determine how much cover to cut, we need to find out how much it shrinks with the core passes inside. Make a mark on the empty cover at a convenient length: here five inches.Now take the core and fold it so it makes a bundle of as many strands as will go into the body of the strop. Tape the end into a lozenge that will slide into the cover easily.Wiggle that tape lozenge into the cover and push it along until it goes past the mark you made at 5″.Milk the cover down smooth over your test bundle and measure it again. Looks like we lost half an inch to shrinkage. So our deduction for four passes of this core in this cover is half an inch for every five, or ten percent if we want to sound super-scientific. So a fourteen-inch strop with two-inch eyes at each end needs at least an extra inch of cover for the body. A six-foot strop would need nearly seven inches extra, so you see the importance of this step.Back to the core length, mark your two buries and cut the core. Now’s a good time to measure the entire cut length so you can either copy it or adjust it on the next one.Measuring the cover, mark a five-inch flap, and give yourself an extra inch or so to bury into the standing part, then mark the length of the eye on the other part. Mind bent? Just look at the picture.Do the same at the far end, after adding enough cover length for the expected shrinkage. It’s wise to add a little more, but not too much. Sound vague? Welcome to the world of high-end rigging, where gut trumps science. It’s very wise to lay the cover out on the bench and make a template at this stage, with a piece of tape at every eyemark, in case the length needs to be adjusted on the second try.Ready at last to start putting things together, you tape one end of the core into a fid, and dive in at one of the inner eyemarks, heading for the far end.Push the fid through and surface at the inner eyemark at the other end of the core.Pull out a healthy loop of core, then dive back in at what in Newfoundland would be called the “offer” eyemark.If you managed not to snag the core that was going in the other direction, you can surface at the other offer eyemark.Bury a little of the core end into the standing part so you can utch it through. No need to taper here: this just feeds it around.Probably obvious, but take the fid off and go on to the next slide.Milk the buried core tail tidily into the core so you can pull all your passes through the cover.Put the offer eye around a bench post or hook and pull on the strand of core that will draw the splice you just made into and through the cover.When you’ve fed all your passes through, remove the splice tail, so you can do the end-for-end splice that closes the loop.Pull enough core out (the cover will scrunch up a bunch) that you can bury your tails into each other.If you’ve got this far in your splicing, this is pretty self-explanatory: just a standard end-for-end splice.Hope you can dig what just happened without a slide sequence to show the end-for-end splice.Taper the bury tails. You can tape the crossover, loosely lockstitch, or just pull it tight.Looking good! Now we’re ready to even out the passes and start closing up the cover.With more passes than these two, it might be good to pre-stretch the strop a little so all the core strands align nicely.At this stage you can see whether, unlike my paychecks, the cover ends will meet. Remember you want the flaps to disappear inside the cover by a quarter inch at least. If they won’t, you must take it all apart and cut a slightly longer cover. If it’s too long, you can get cover slack out by cheating the eyes smaller (you’ll see it in action), and hope the eye length is negociable.If everything looks good, taper the flaps, eight picks, then six.Bury the tapered flap into the cover with a wire fid, being very careful not to snag core strands.Hold the tail of the flap firmly (pliers help), while milking the cover up toward the eye. Here’s where excess cover slack is manifest, and you decide you wanted that ol’ cover pretty slack anyway. In the picture, I’ve buried the flap a second time to get it farther along: that bulge is it about to disappear.Trim off the flap at an angle and suck it back in.It’ll look like this if everything’s gone according to plan.To stitch the eye crossovers shut, I use a yarn pulled from some scrap cover.The first stitch comes in from far enough away that the tail is buried.You must grab some of each side without engaging the core when stiching the crossovers.The first stitch begins with a knot, pulled snug by pulling on the buried tail and the working end.The rest of the stitches follow around the crossover, and the finish is the reverse of the start.If you were tidy, the stitching on the finished eye should be undetectable. Crude, huge, obvious stitches are a sign of lazyness and incompetence. If you got this far, you are not incompetent, and should not be lazy.